How to Stream Internet Radio to YouTube, Telegram, Facebook, and Other Platforms
Our Internet radio platform can automatically relay your station’s broadcast to social networks and video platforms, including:
This article explains how to integrate radio stations that are already running on our platform with social networks.
Important: You can stream audio or video to social networks without our platform, for example by using OBS Studio. However, this option is not covered in this article. Here, we will show you how to connect an existing Internet radio station running on the Radio-Tochka.com platform to social networks.
Once everything is set up, listeners will be able to tune in to your station just as they would watch a regular video stream: they can listen to music, chat on the social network, and access the broadcast on a phone, computer, or Smart TV, or through a web browser. YouTube, RuTube, and other platforms are available on almost any device.
During the stream, your station’s logo or a video loop can be displayed instead of regular video. You can upload a short video clip that will automatically repeat throughout the broadcast.
Please note that, due to the technical limitations of this integration, listeners who connect through social networks will not be included in the listening statistics on our platform. As a result, they will not appear in your station’s audience charts and reports.
Setting Up Radio Streaming on YouTube
-
Create or prepare a YouTube account.
You probably already have a YouTube account. However, for an Internet radio station, it is better to create a separate account or channel and name it after your station. This will make it easier for listeners to find your station and give the stream a more professional appearance.
-
Get the server URL and stream key.
Sign in to YouTube with the account you will use to stream your radio station.
Then open the live streaming dashboard:
https://www.youtube.com/live_dashboard
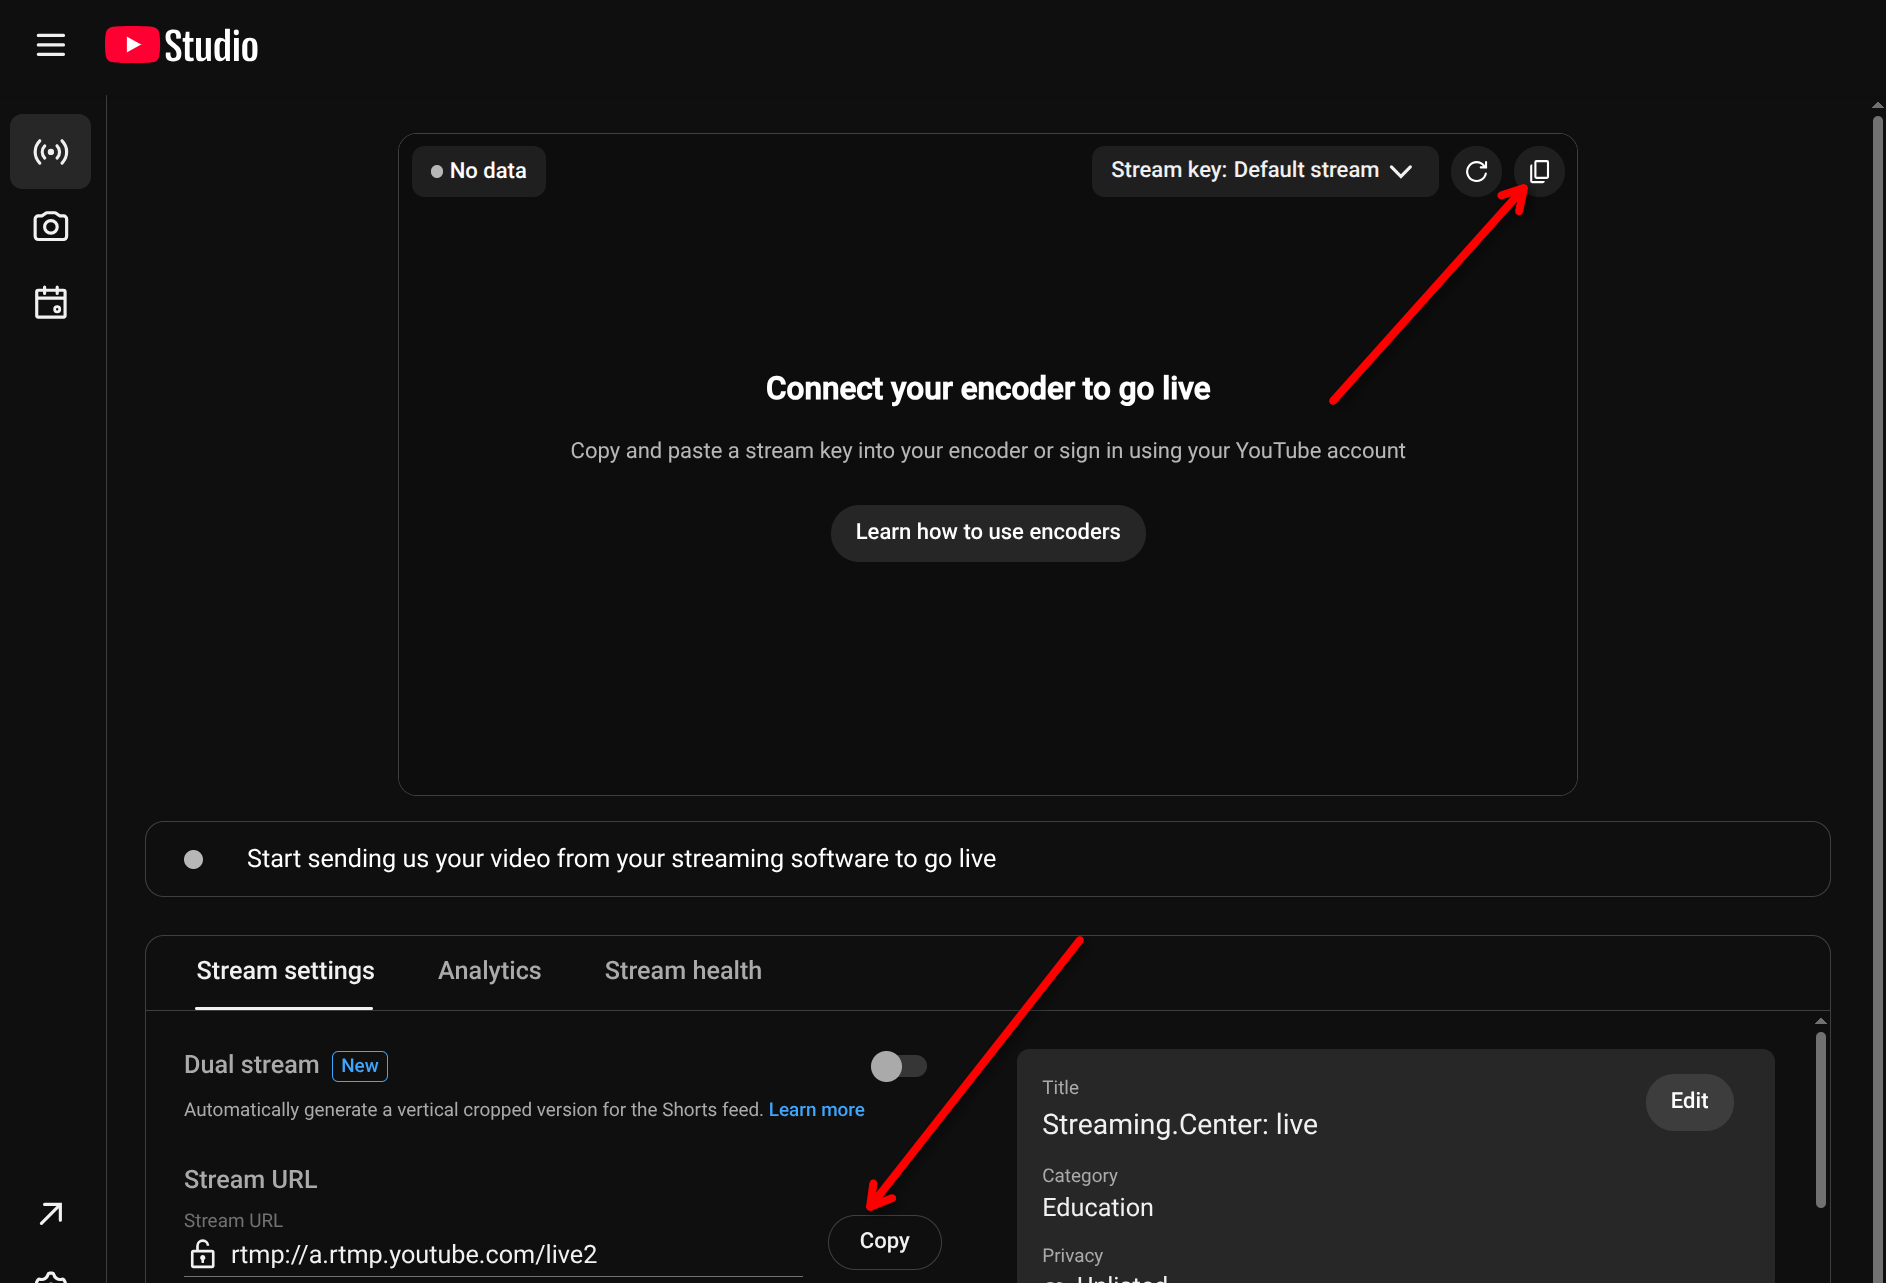
Copy the following two values from the live streaming dashboard:
- Server URL
- Stream key
For example, in our case:
- Key:
kmq2-ghku-2hys-7ag0-9z7f - Server URL:
rtmp://a.rtmp.youtube.com/live2
You will need these details to connect your radio station to YouTube.
If you have never started a live stream from this account before, YouTube may ask you to enable live streaming first. Activation can take some time, so it is best to do this in advance.
-
Connect your radio stream to YouTube.
Open your Internet radio control panel. On the main page, where your broadcast channels are listed, select the channel you want to use.
A single radio station can have multiple channels, for example:
- 320 kbps MP3
- 64 kbps MP3
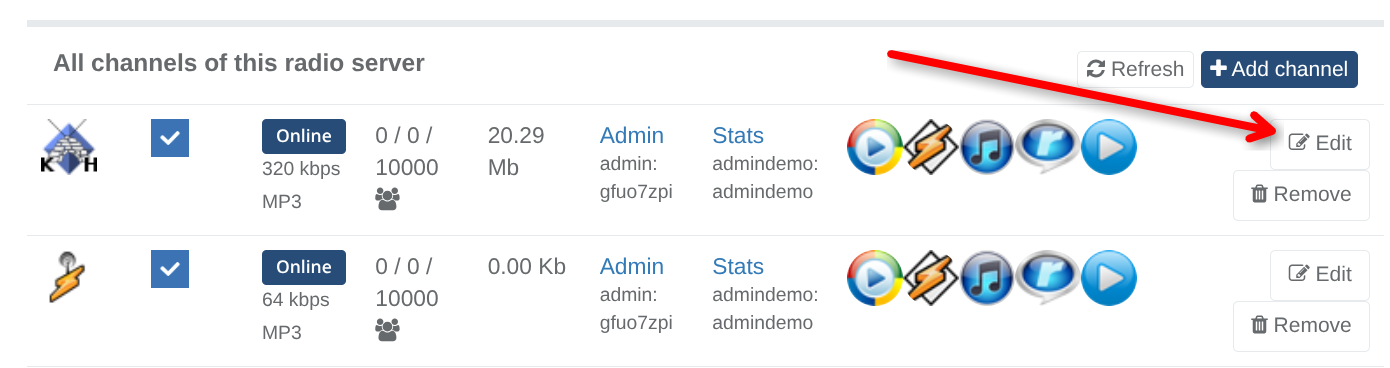
Only one channel can be connected to YouTube. We recommend selecting the highest-quality channel. In the example above, that is the 320 kbps MP3 channel.
Your YouTube stream will use the audio quality of the selected channel.
-
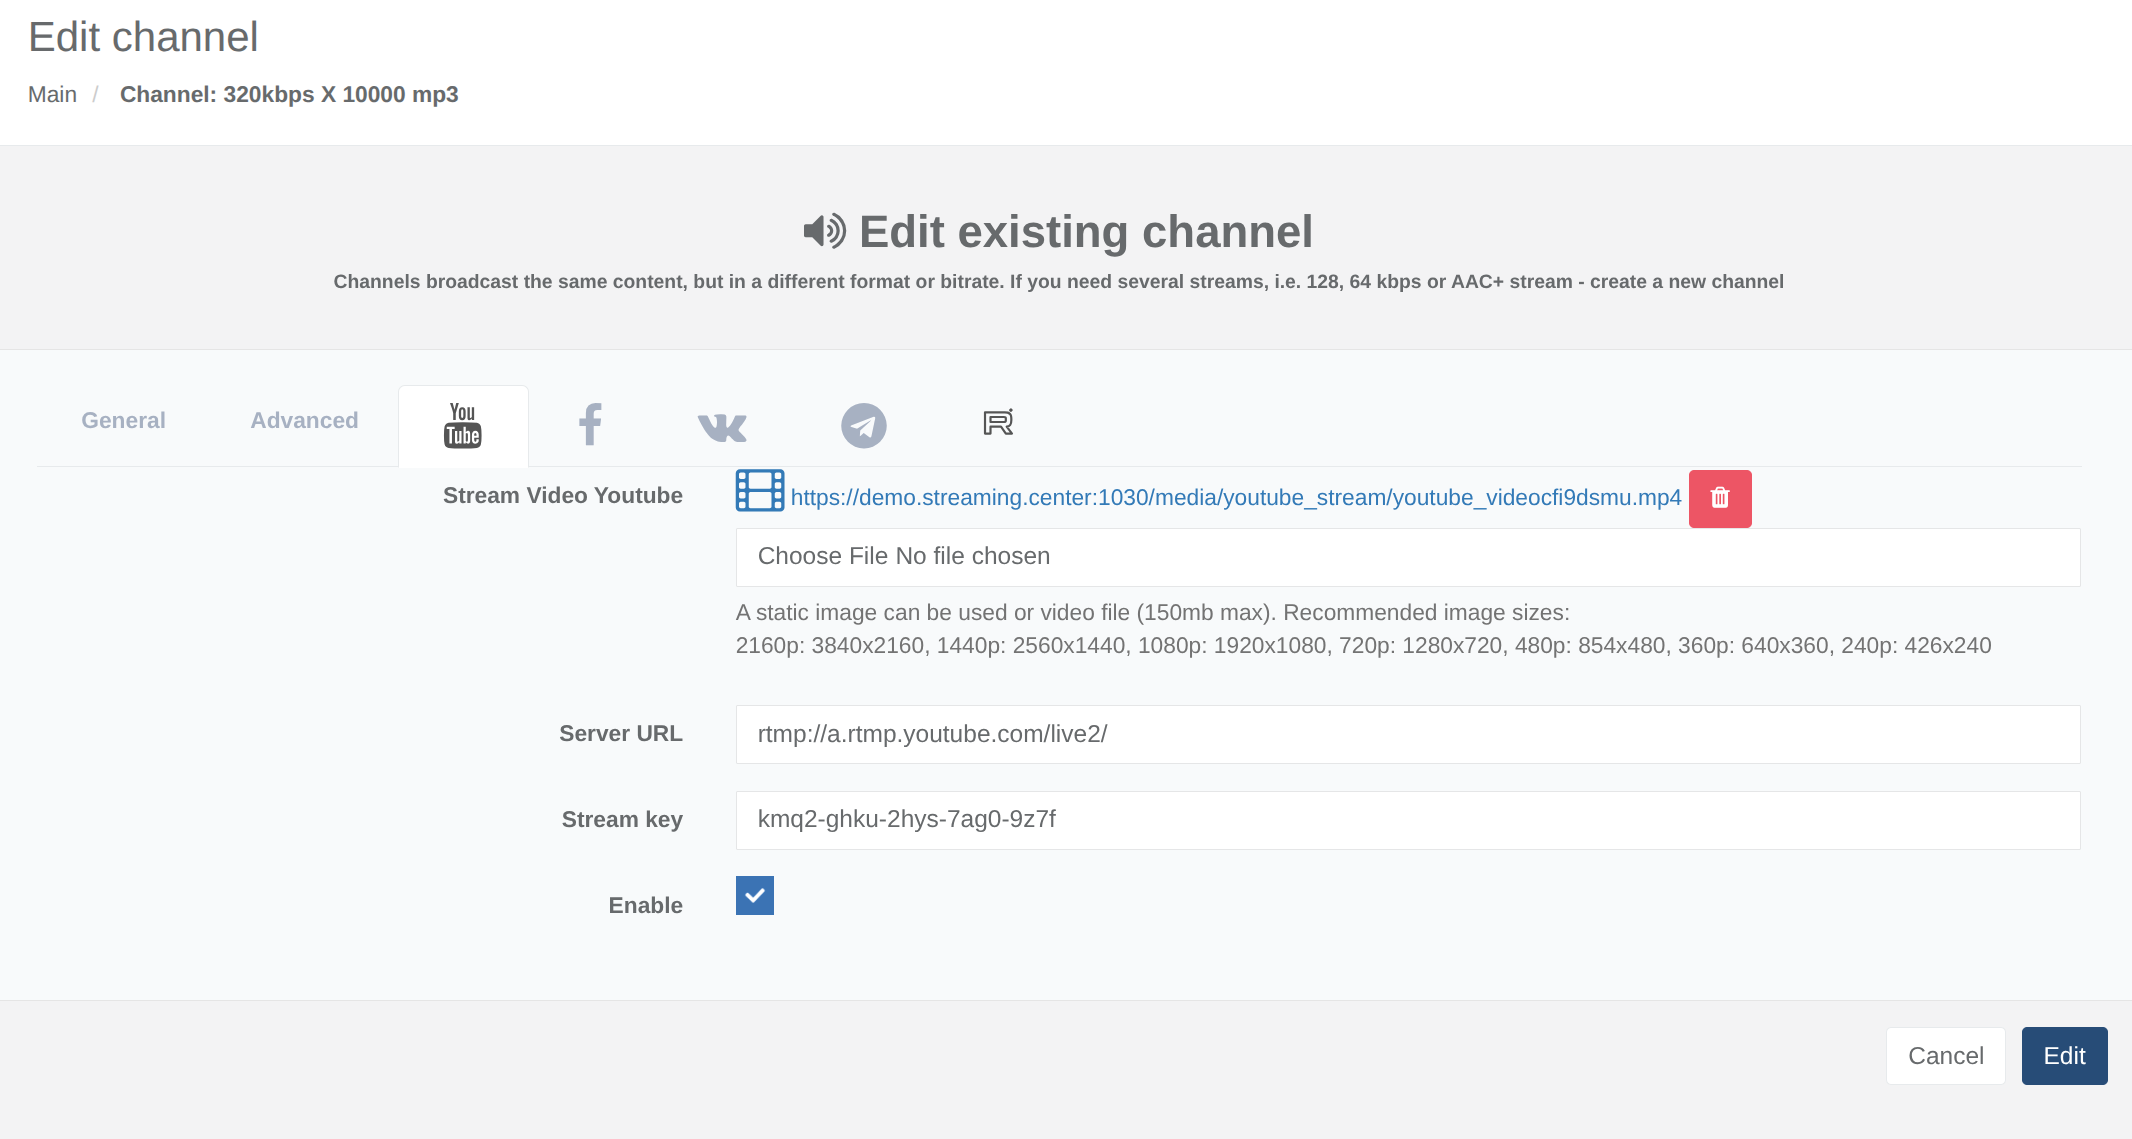
Enter the YouTube settings in the control panel.
Click Edit for the selected channel.
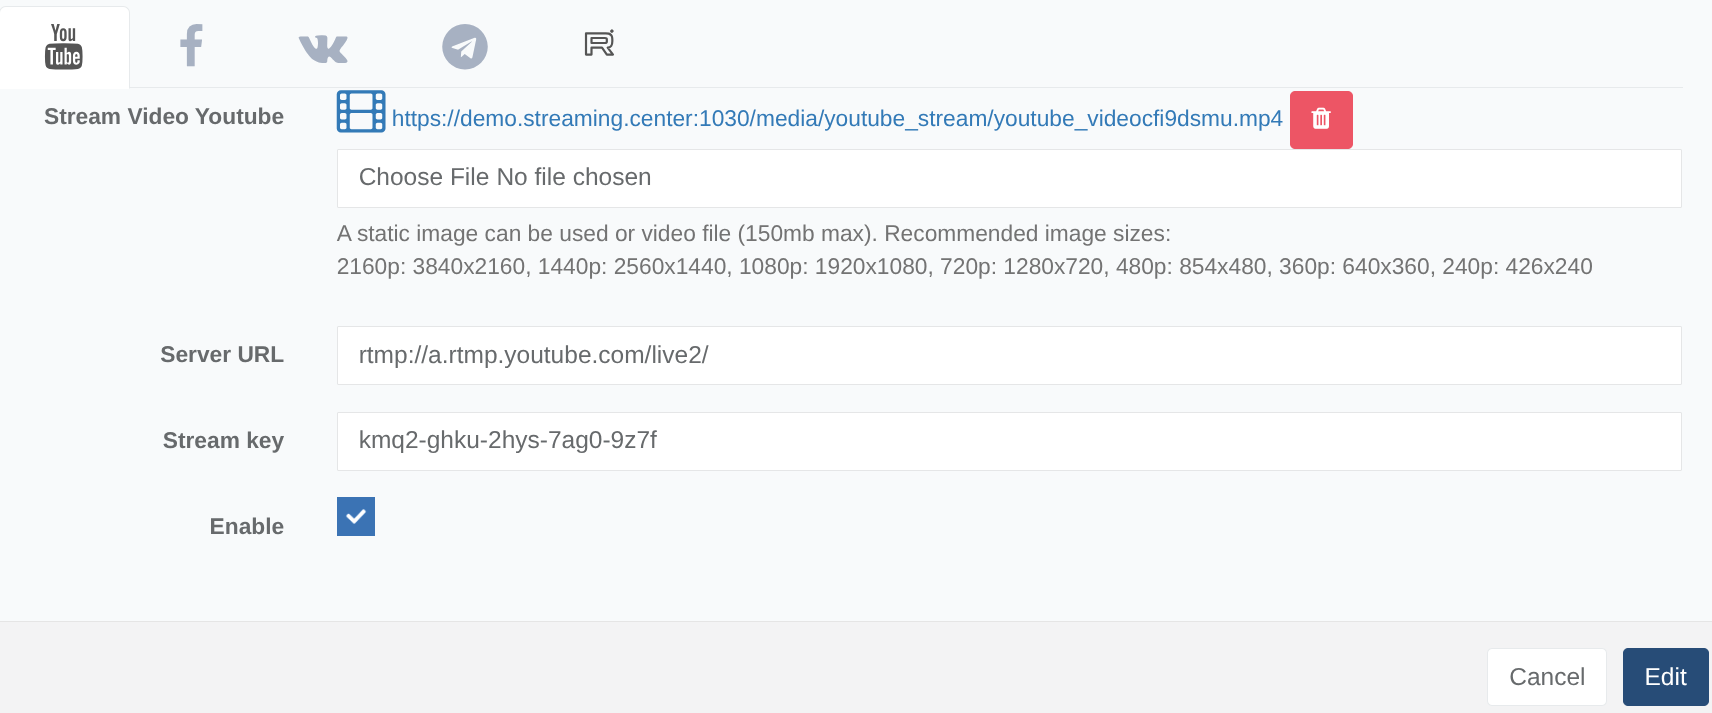
In the settings window, open the YouTube section and fill in the required fields:
- stream URL;
- stream key;
- a logo image or video clip to use as the stream visual.
The uploaded logo or video clip will be displayed in the YouTube stream instead of regular video.
Once all fields have been filled in correctly, you can enable streaming. Select the checkbox to enable the stream, then save the settings.
To stop streaming to YouTube, clear this checkbox and save the settings again.
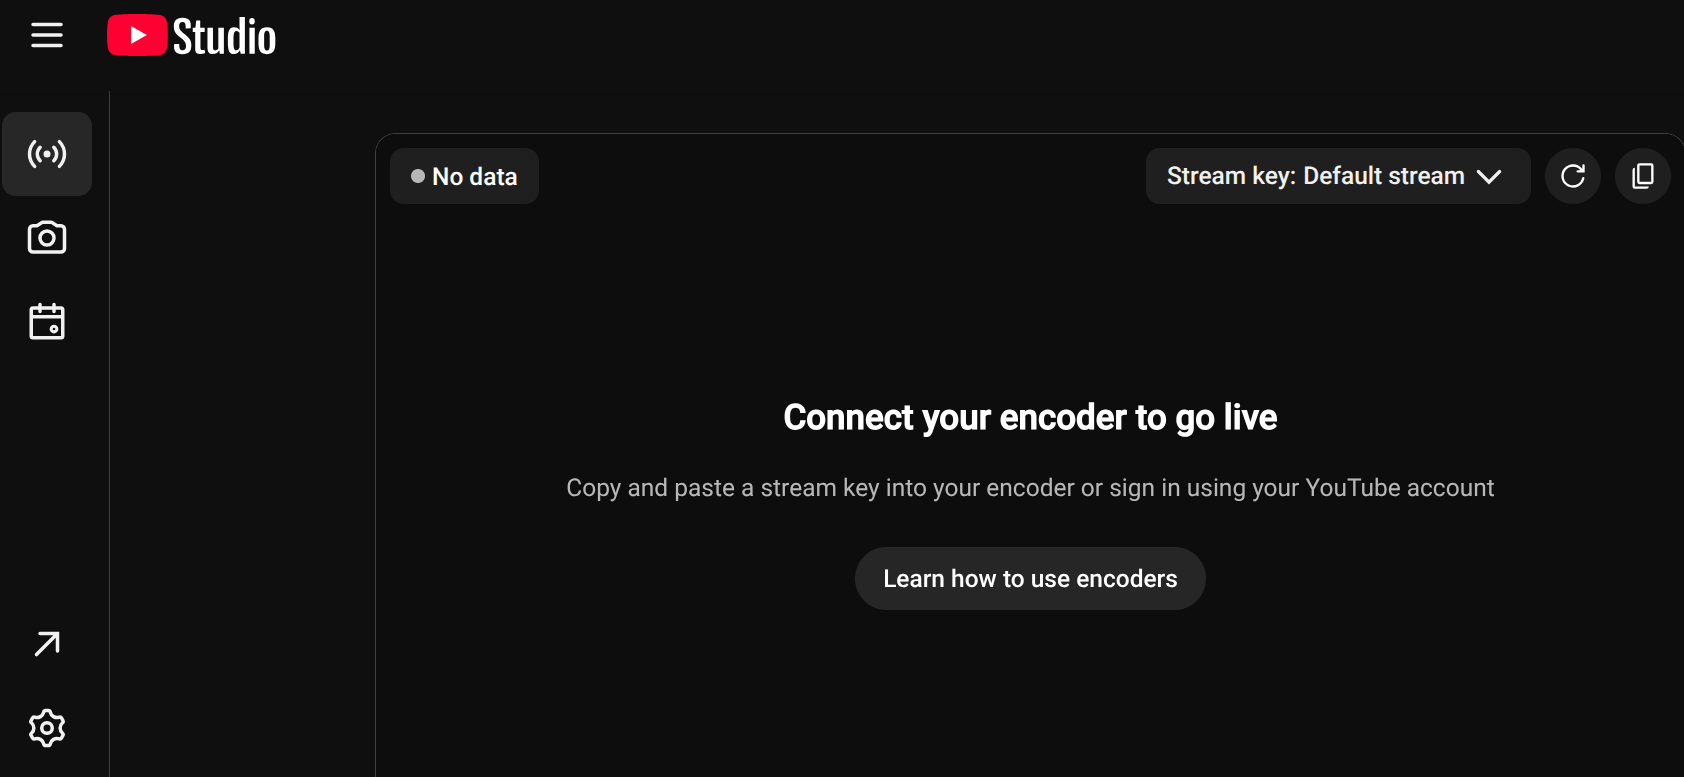
The result should look similar to this:
An image should appear in the YouTube live streaming dashboard, and the stream status should change to LIVE:
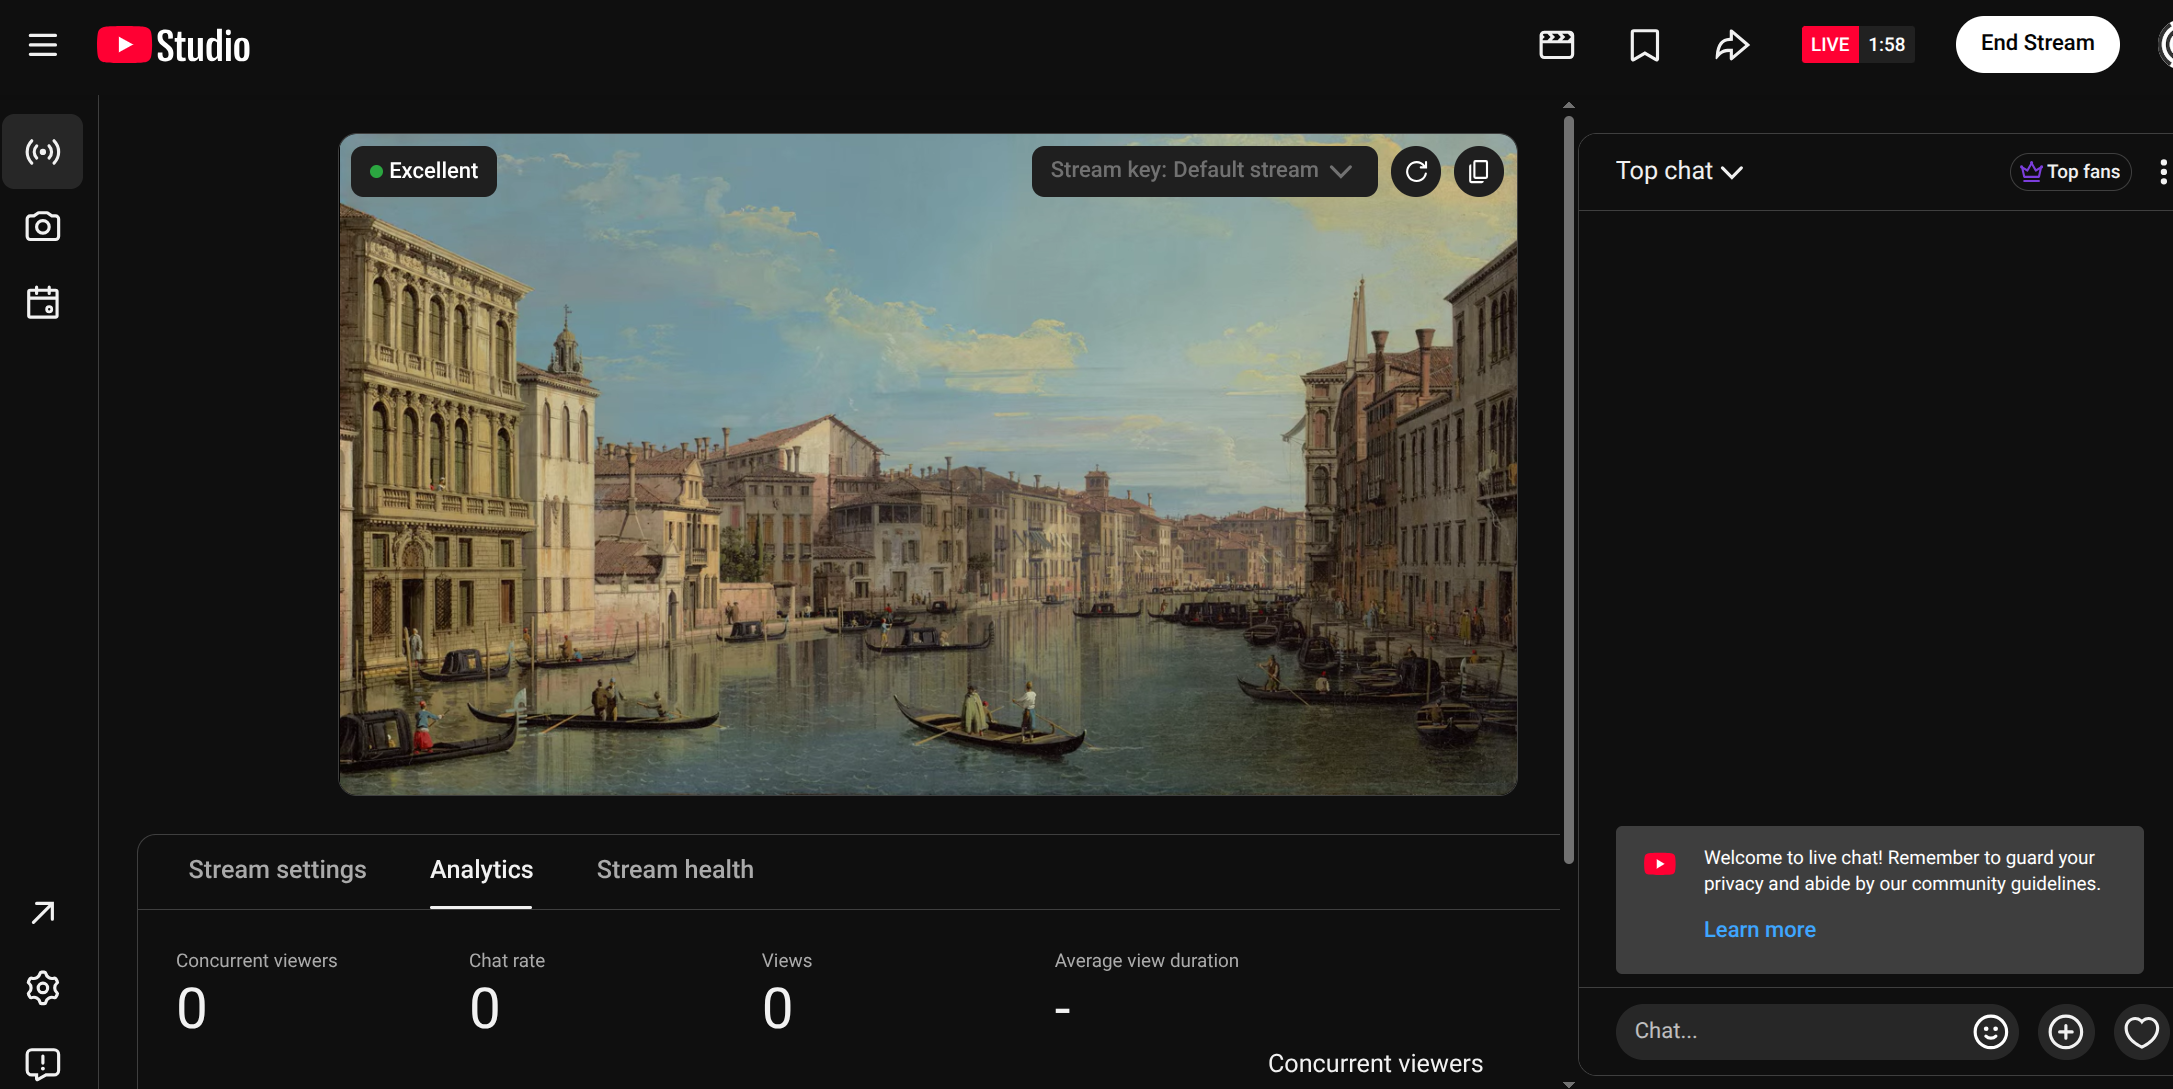
Congratulations! Your radio station is now streaming on YouTube.
Please note that when you stream audio to YouTube, the service automatically checks the content for copyright violations and may block the stream.
Setting Up Internet Radio Streaming on Telegram
-
Prepare a Telegram channel or group.
You must have your own Telegram channel or group to broadcast—create one in advance. You will need the Telegram desktop app to configure streaming; the web and mobile versions cannot be used for this.
-
Get the server URL and stream key.
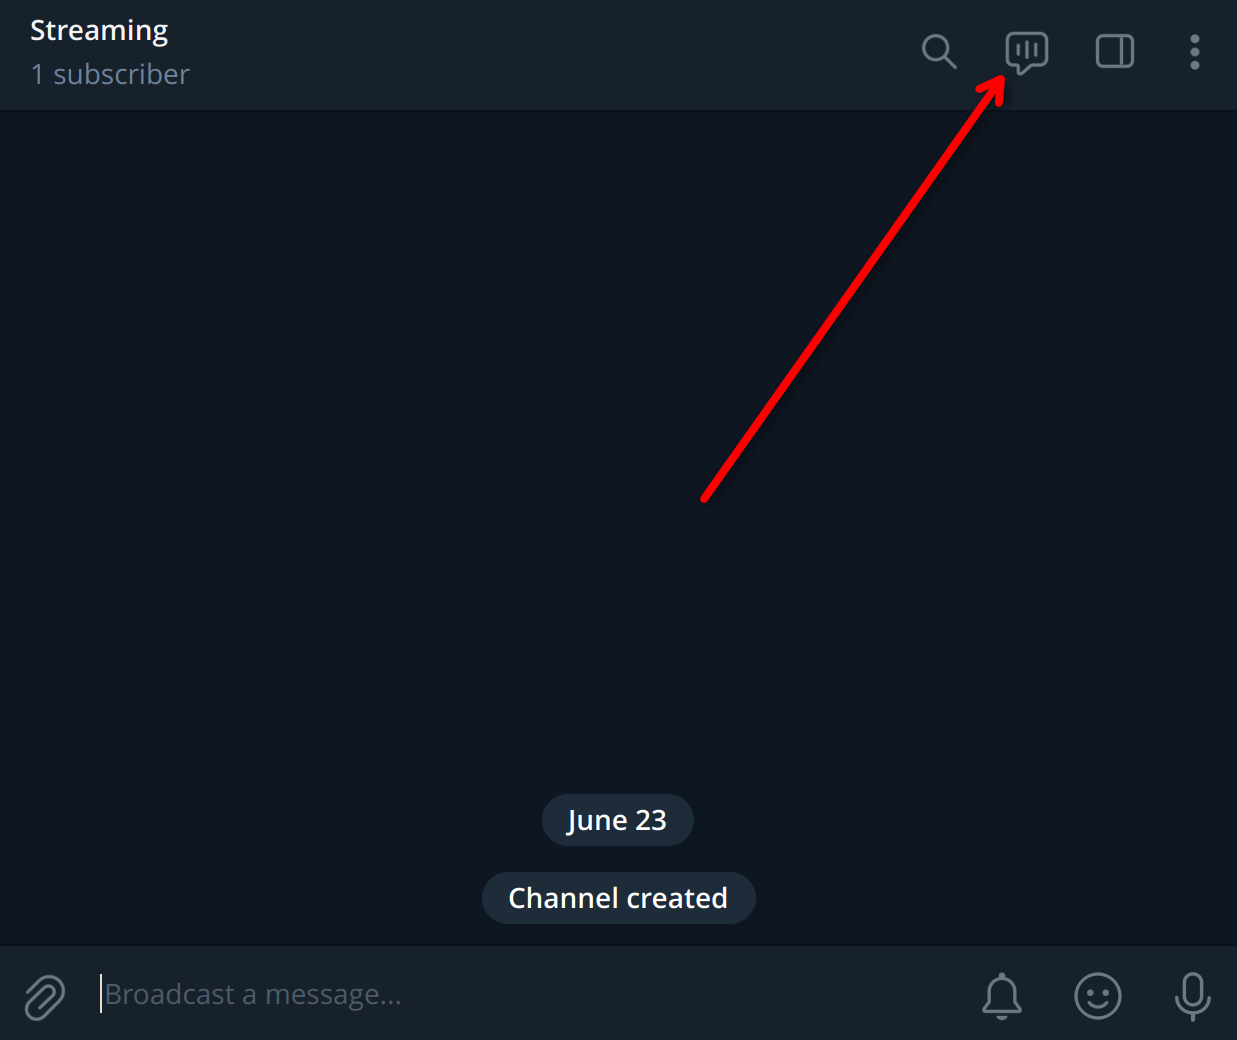
Open the channel or group you want to use and click the button at the top of the window to create a live stream:
-
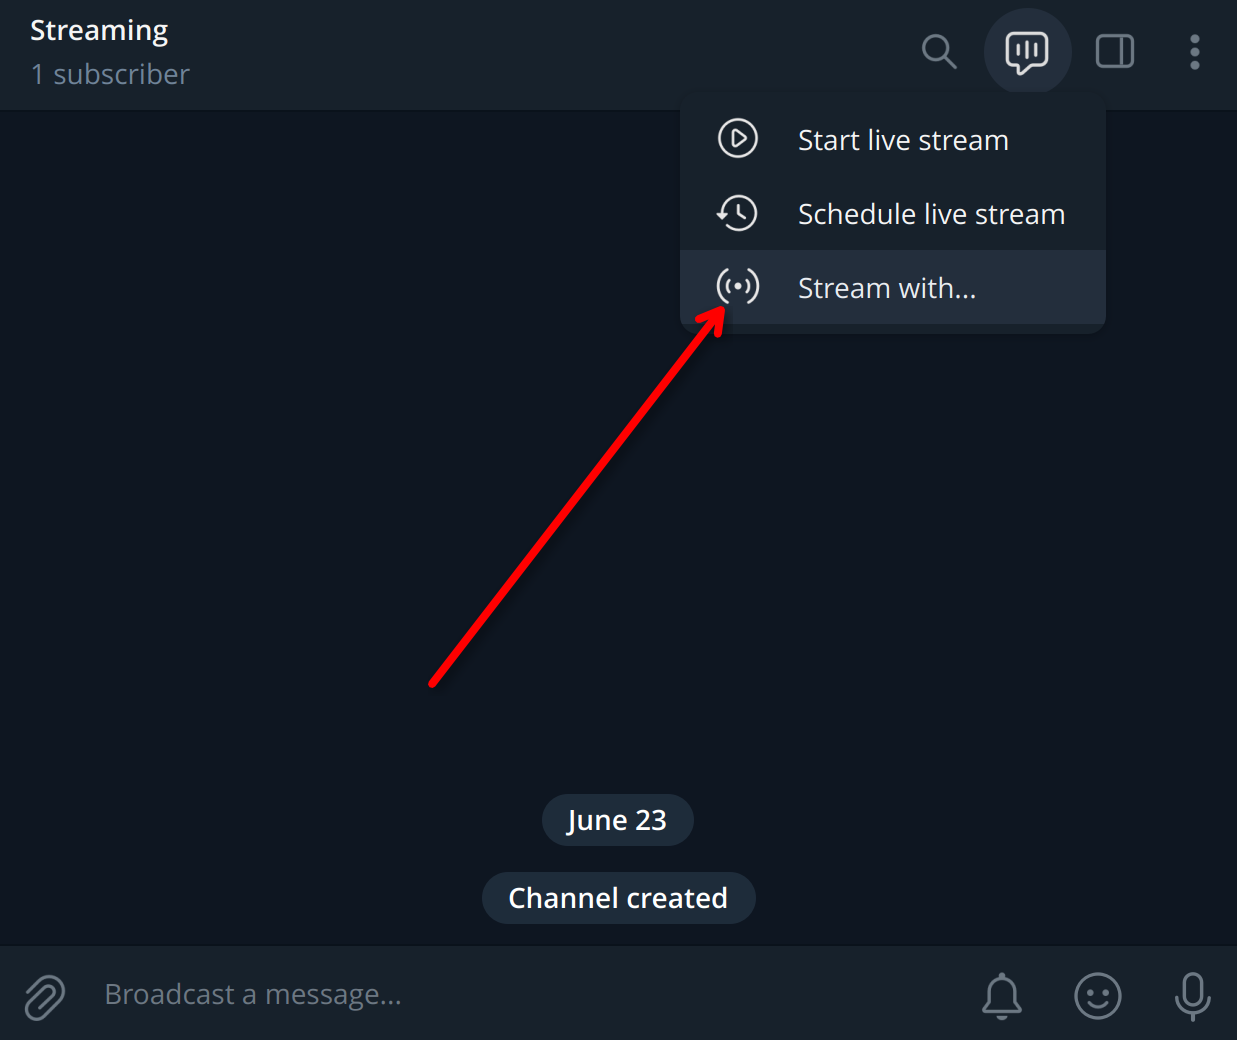
Select Stream With… from the drop-down menu:
-
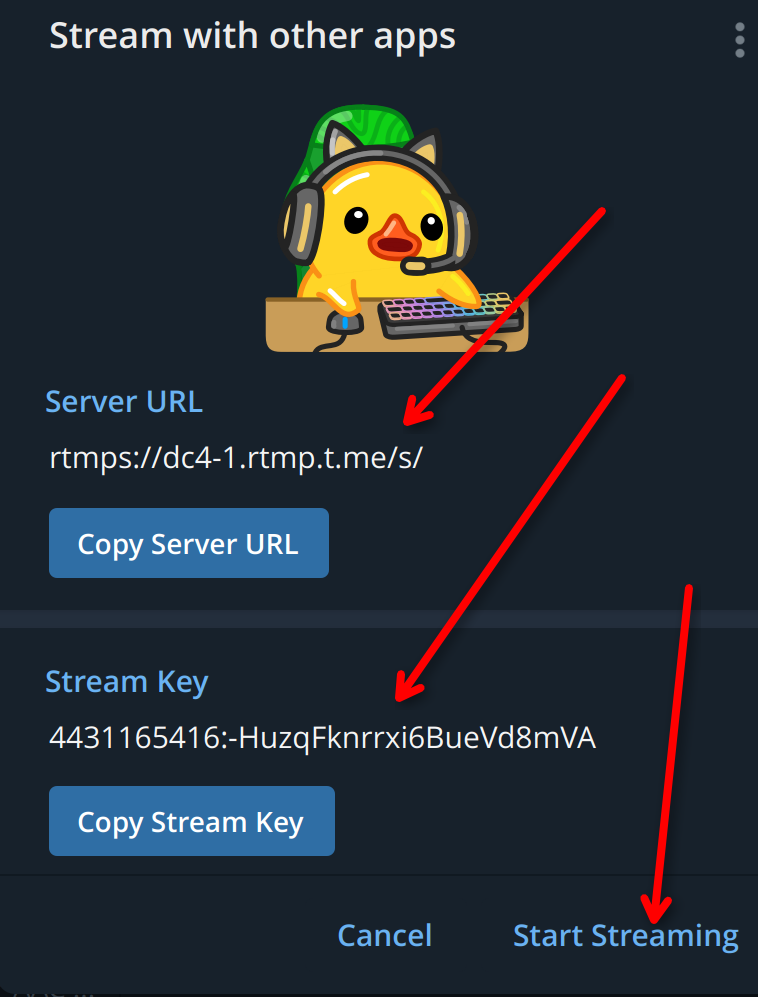
Copy the server URL and stream key, then click Start Streaming:
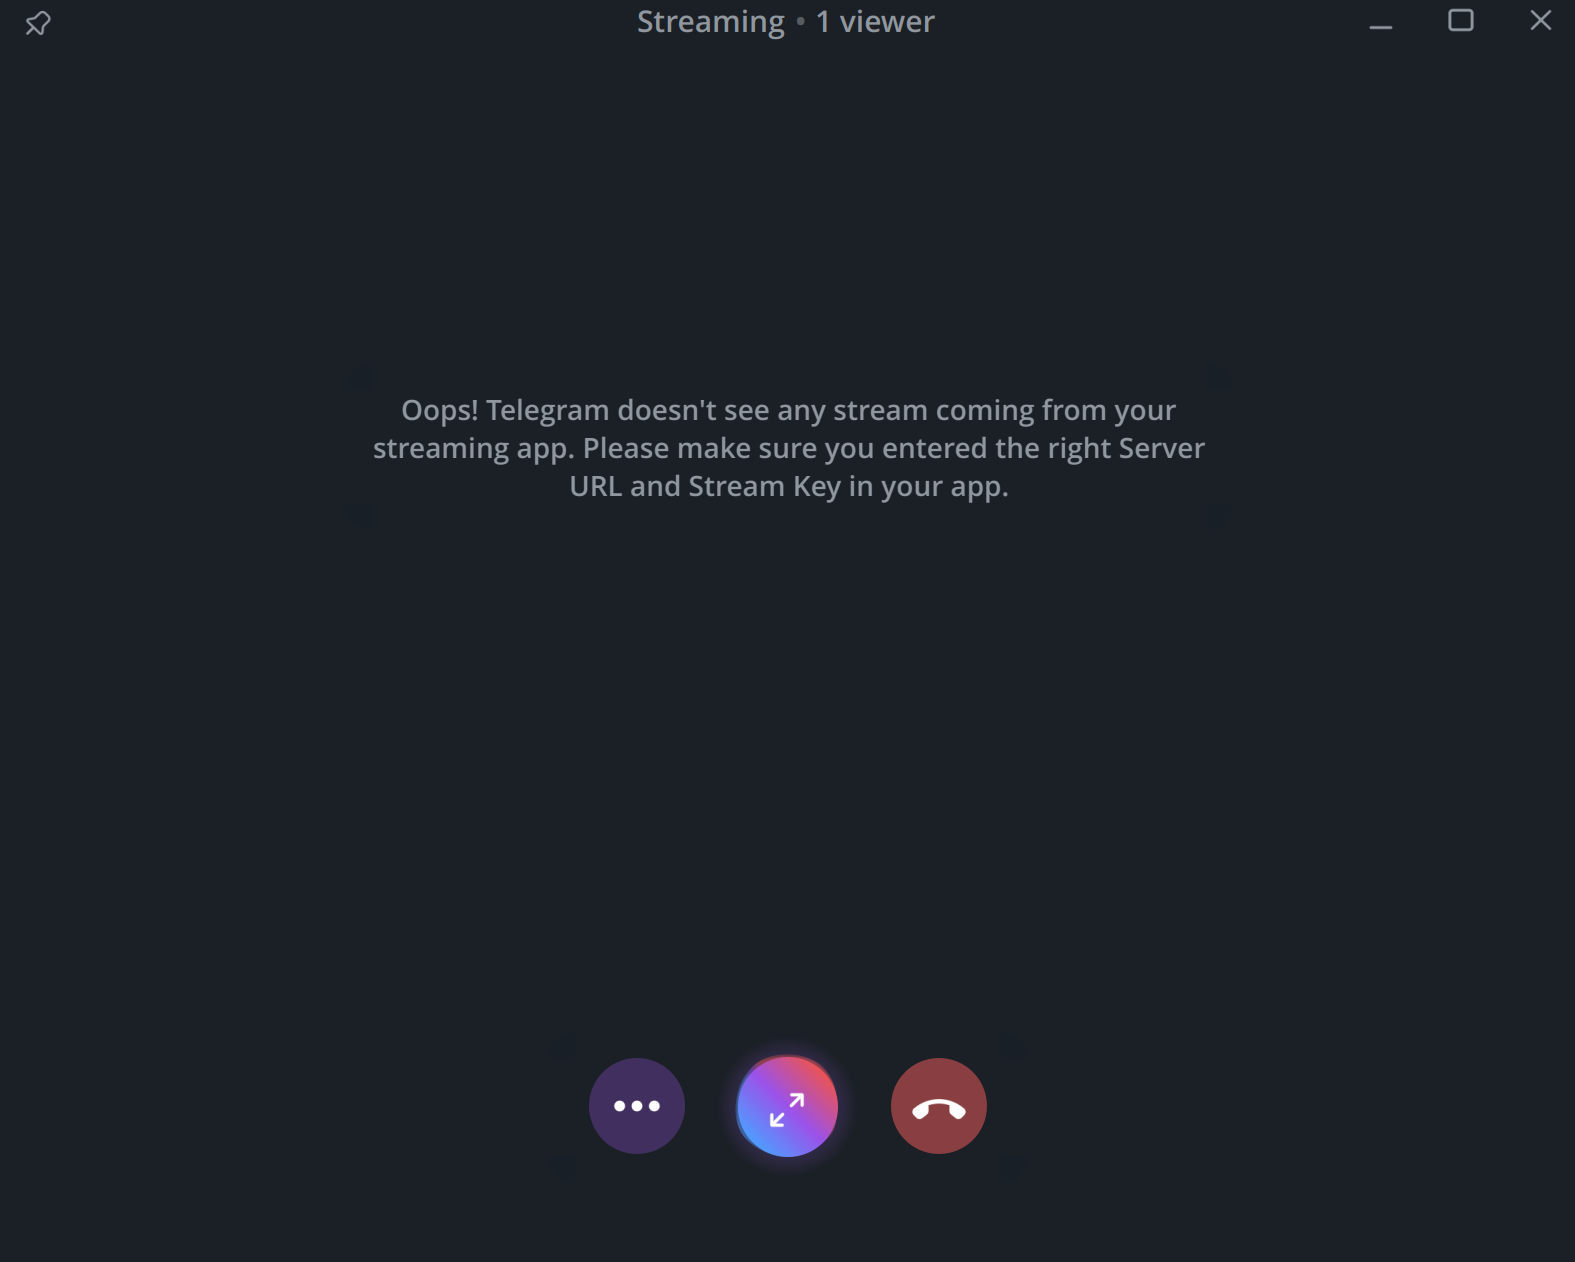
An empty stream window will then appear:
-
Connect your radio stream to Telegram.
Open your Internet radio control panel. On the main page, where your broadcast channels are listed, select the channel you want to use.
A single radio station can have multiple channels, for example:
- 320 kbps MP3
- 64 kbps MP3
Only one channel can be connected to Telegram. We recommend selecting the highest-quality channel. In the example above, that is the 320 kbps MP3 channel.
The audio quality of your Telegram stream will generally match that of the selected channel, although Telegram’s servers may transcode it.
-
Enter the Telegram settings in the control panel.
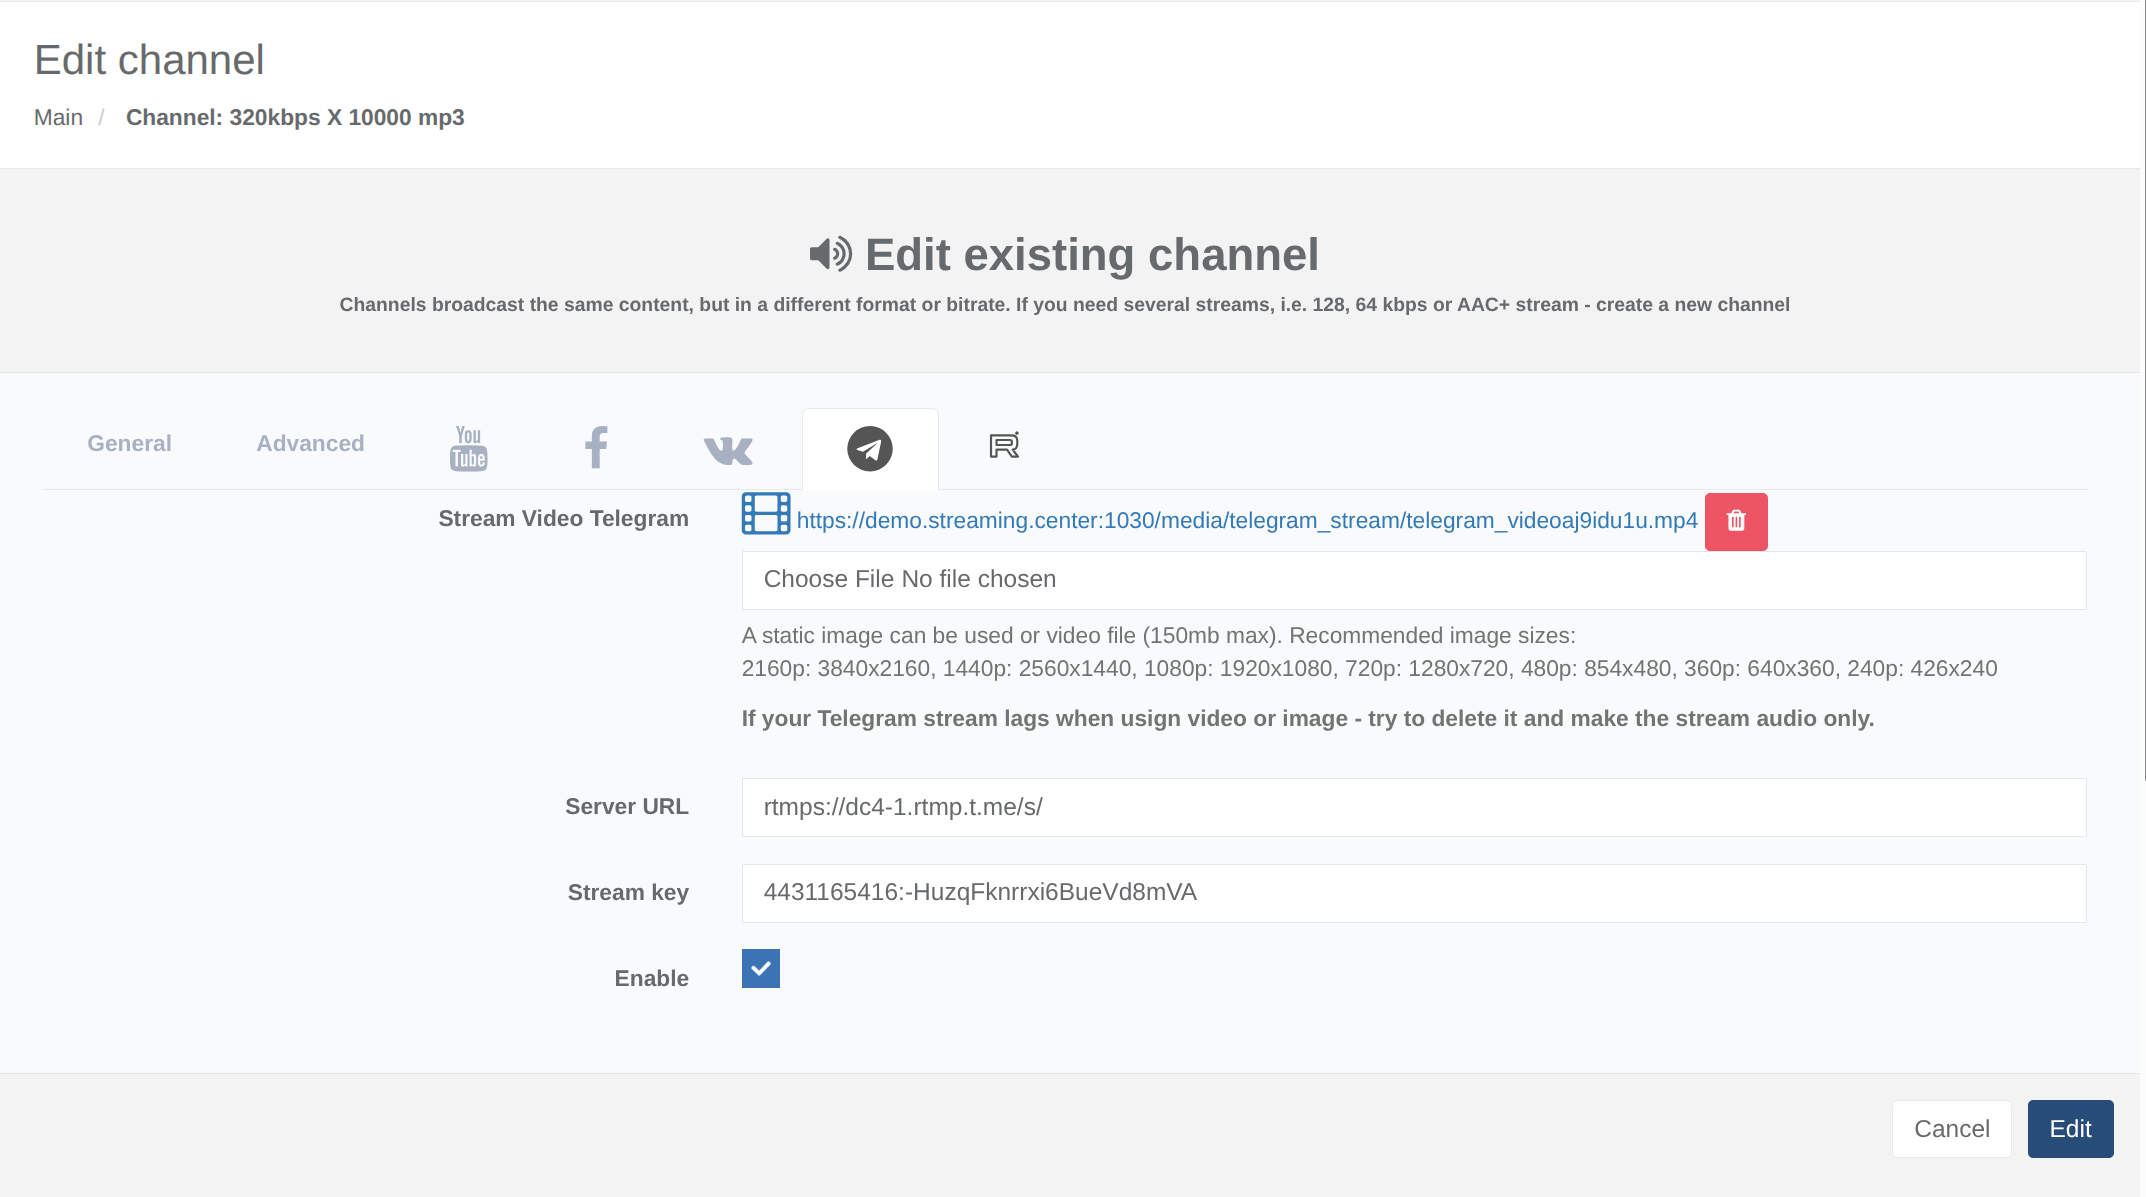
Click Edit for the selected channel.
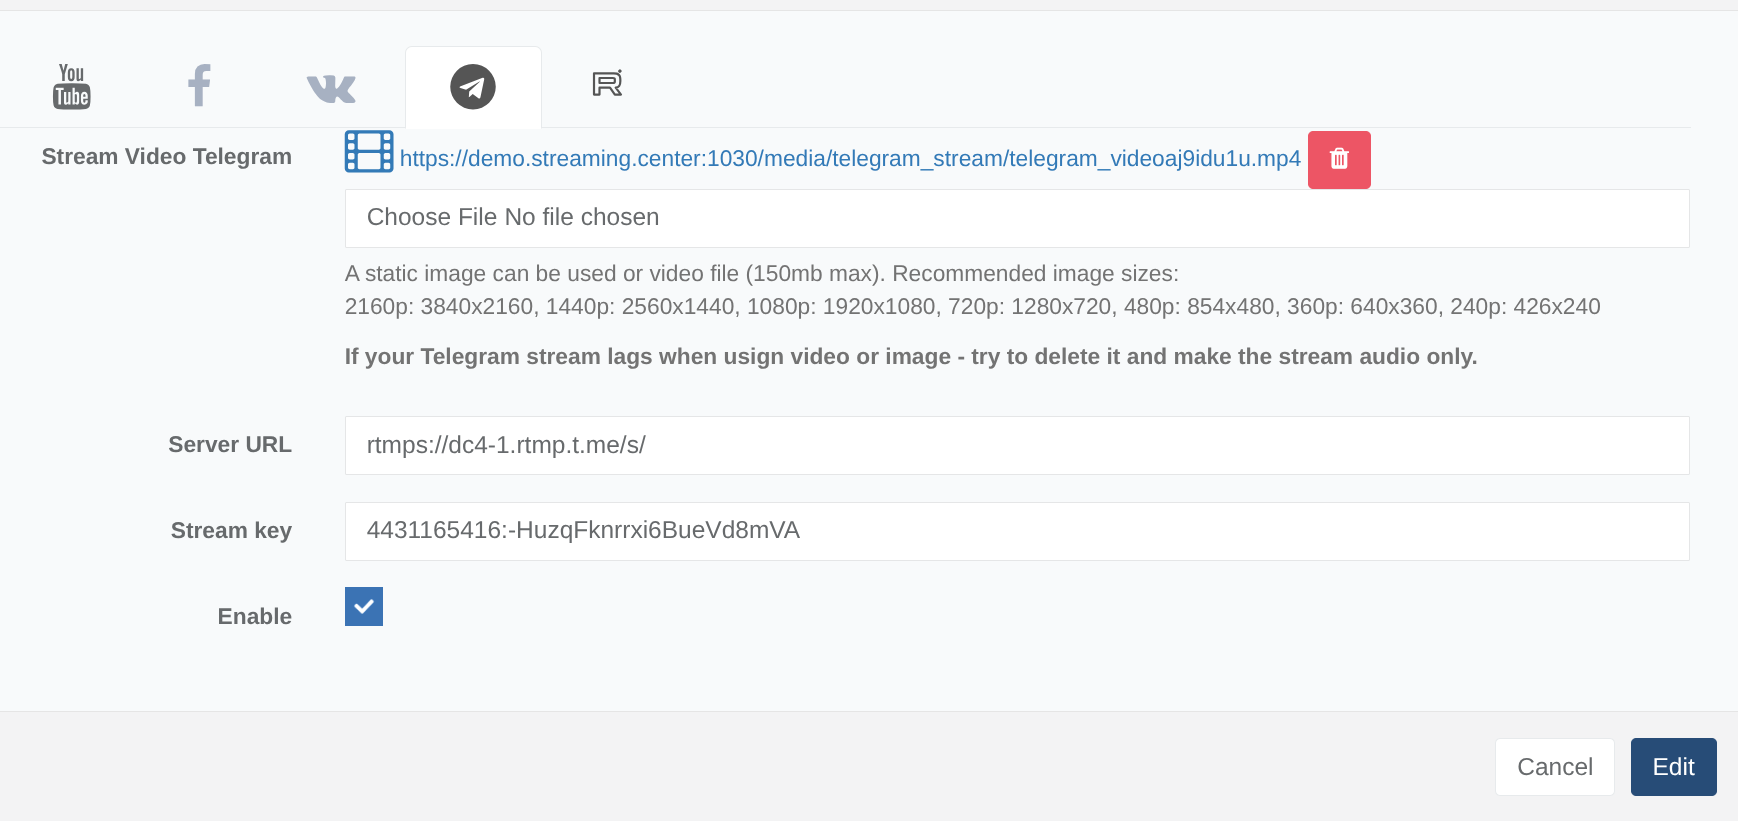
In the settings window, open the Telegram section and fill in the required fields:
- stream URL;
- stream key;
- a logo image or video clip to use as the stream visual.
The uploaded logo or video clip will be displayed in the Telegram stream instead of regular video.
Once all fields have been filled in correctly, you can enable streaming. Select the checkbox to enable the stream, then save the settings.
To stop streaming to Telegram, clear this checkbox and save the settings again.
The result should look similar to this:
After you save the settings, the stream visual should appear in the Telegram stream window, and broadcasting will begin:
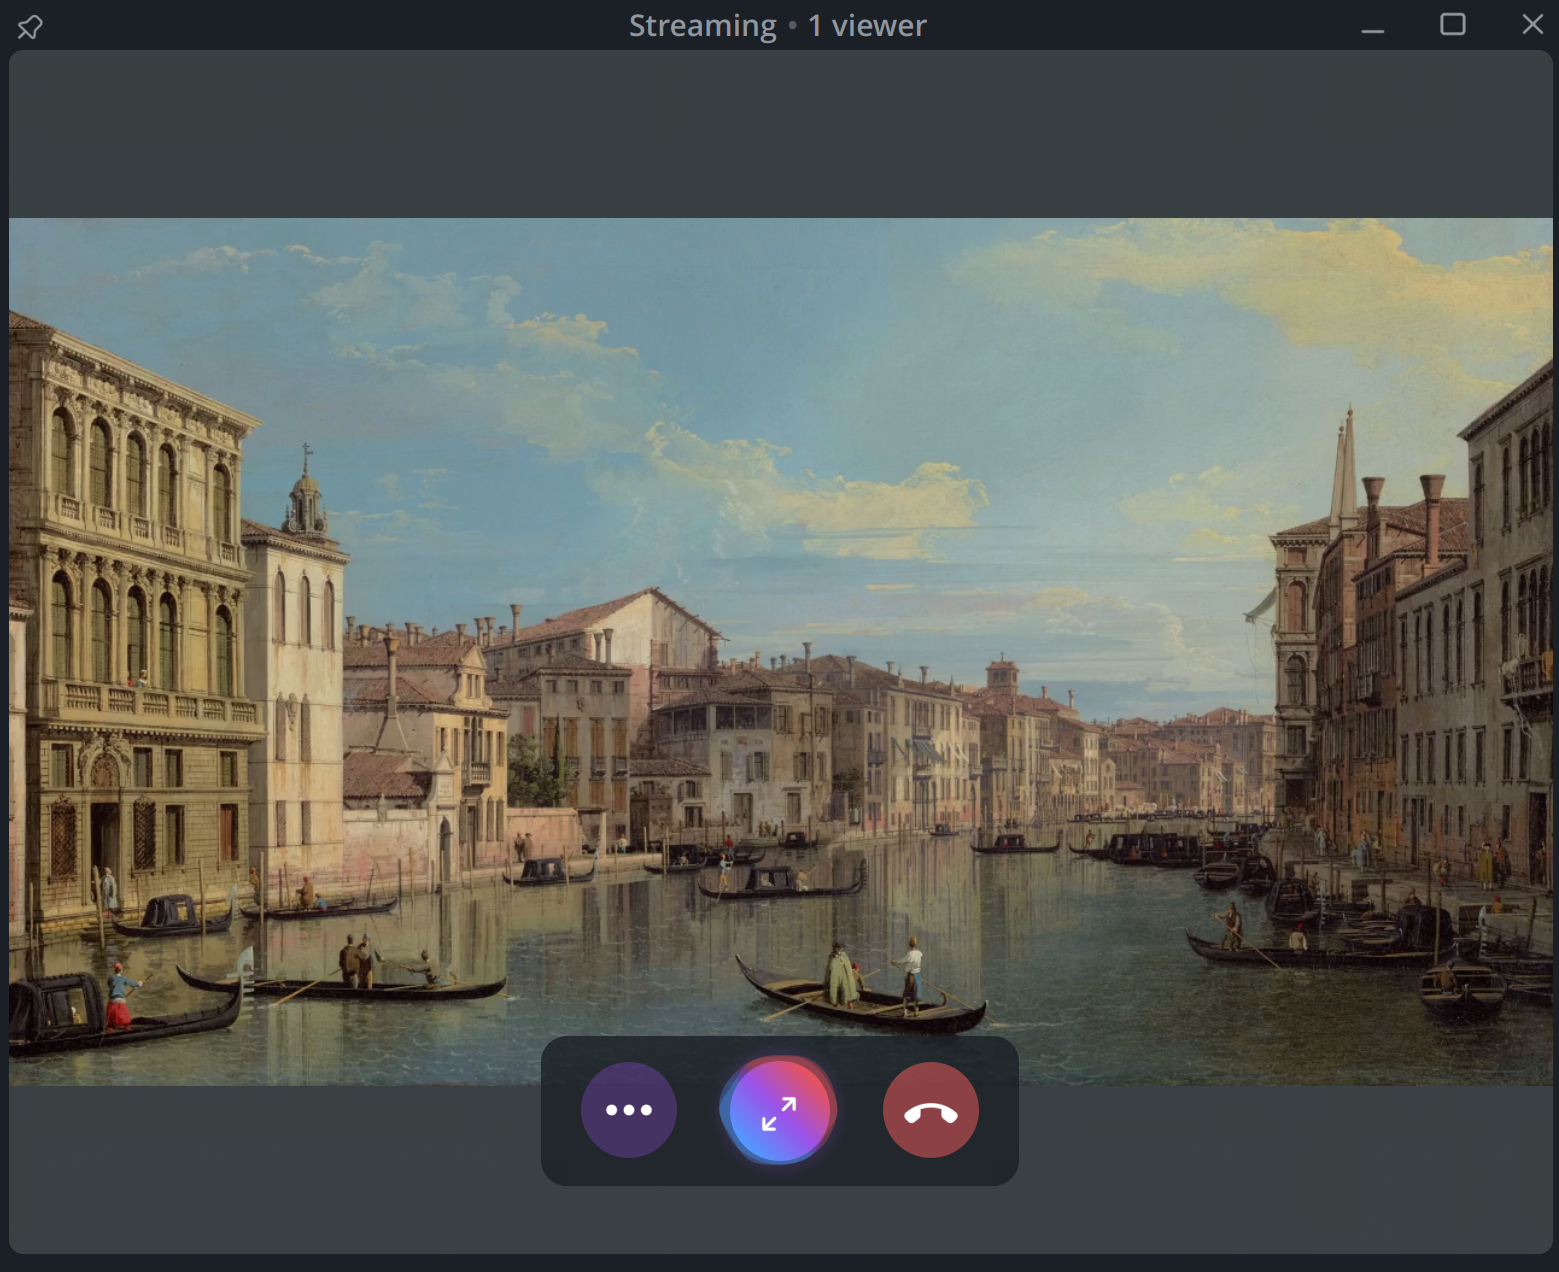
Congratulations! Your radio station is now streaming on Telegram.
Please note that when you stream to Telegram, the feed is delivered through Telegram’s servers. If listeners experience interruptions or connection problems during playback, these issues are outside our control.
Setting Up Internet Radio Streaming on Facebook
-
Create or prepare a Facebook account.
You probably already have a Facebook account. However, for an Internet radio station, it is better to create a separate account or group and name it after your station. This will make it easier for listeners to find your station and give the stream a more professional appearance.
-
Get the server URL and stream key.
Sign in to Facebook with the account you will use to stream your radio station.
Then open Facebook Live Producer:
https://www.facebook.com/live/producer
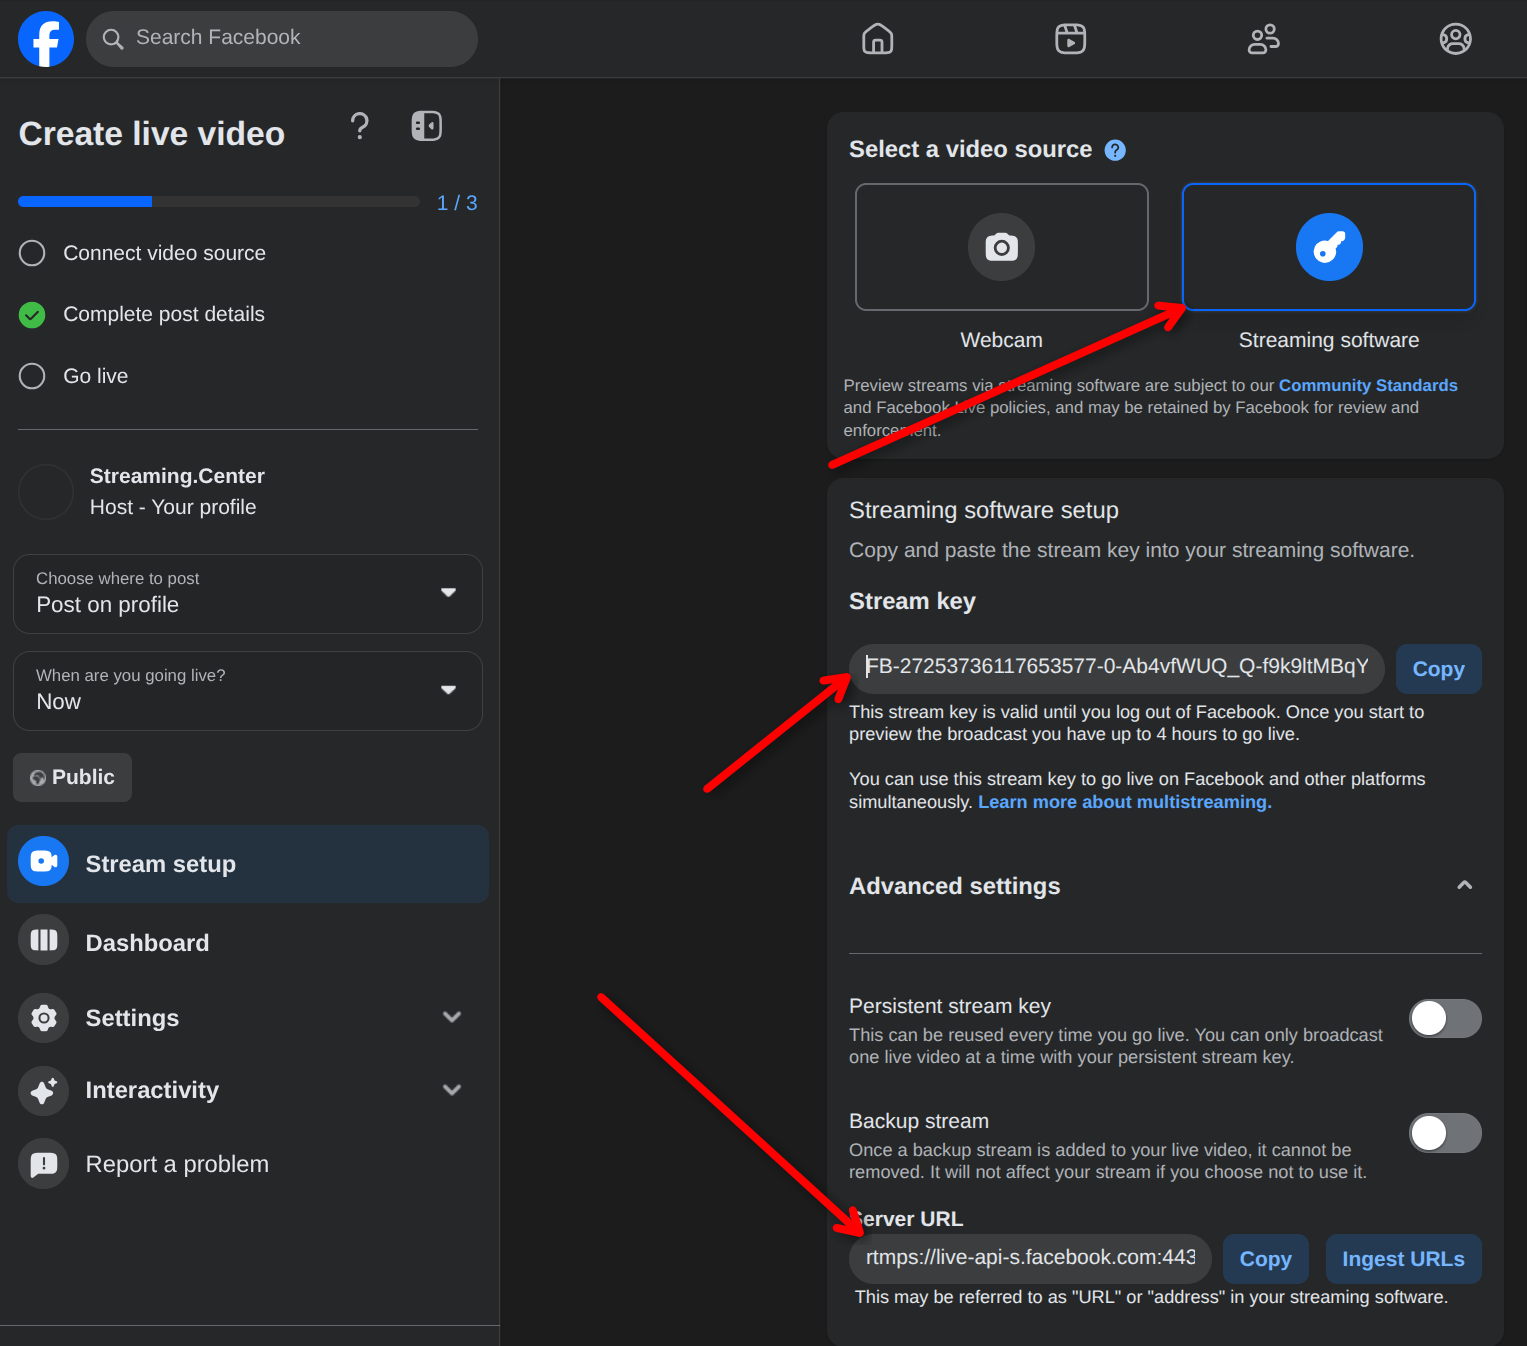
In Live Producer, click Go Live:
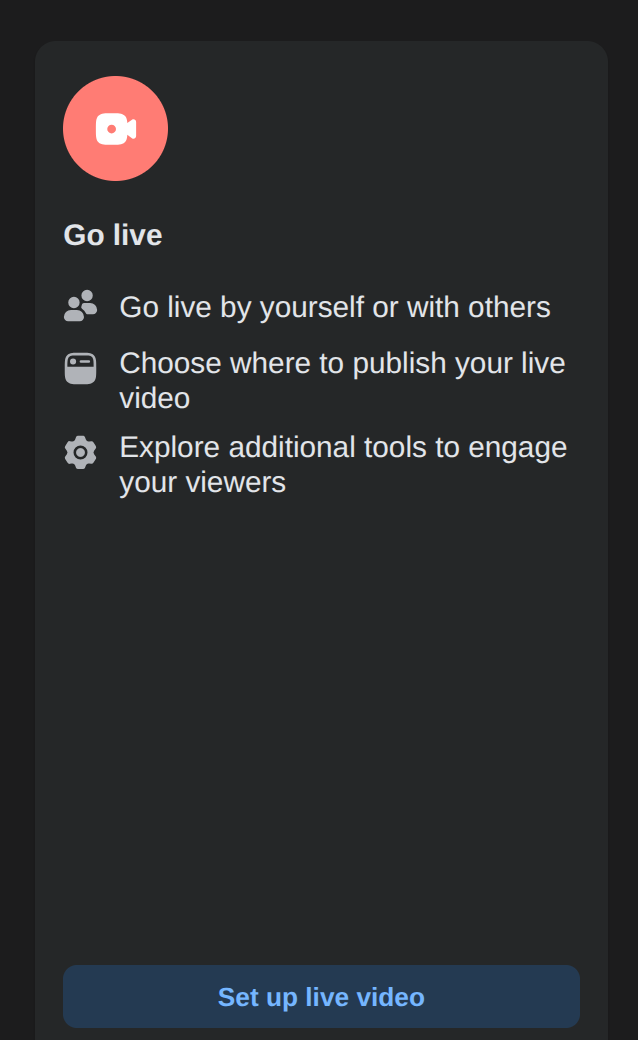
Select Streaming Software as the video source, then copy the following two values from the live streaming dashboard:
- Server URL
- Stream key
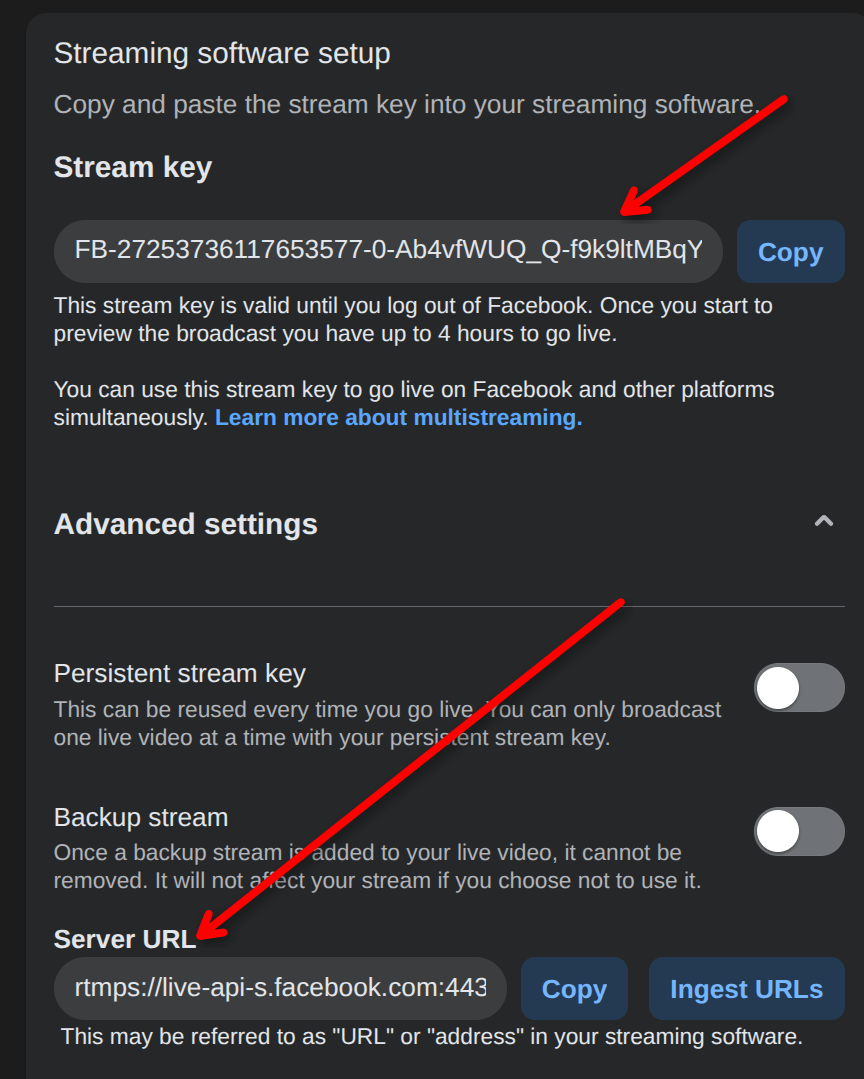
You will need these details to connect your radio station to Facebook.
-
Connect your radio stream to Facebook.
Open your Internet radio control panel. On the main page, where your broadcast channels are listed, select the channel you want to use.
A single radio station can have multiple channels, for example:
- 320 kbps MP3
- 64 kbps MP3
Only one channel can be connected to Facebook. We recommend selecting the highest-quality channel. In the example above, that is the 320 kbps MP3 channel.
Your Facebook stream will use the audio quality of the selected channel.
-
Enter the Facebook settings in the control panel.
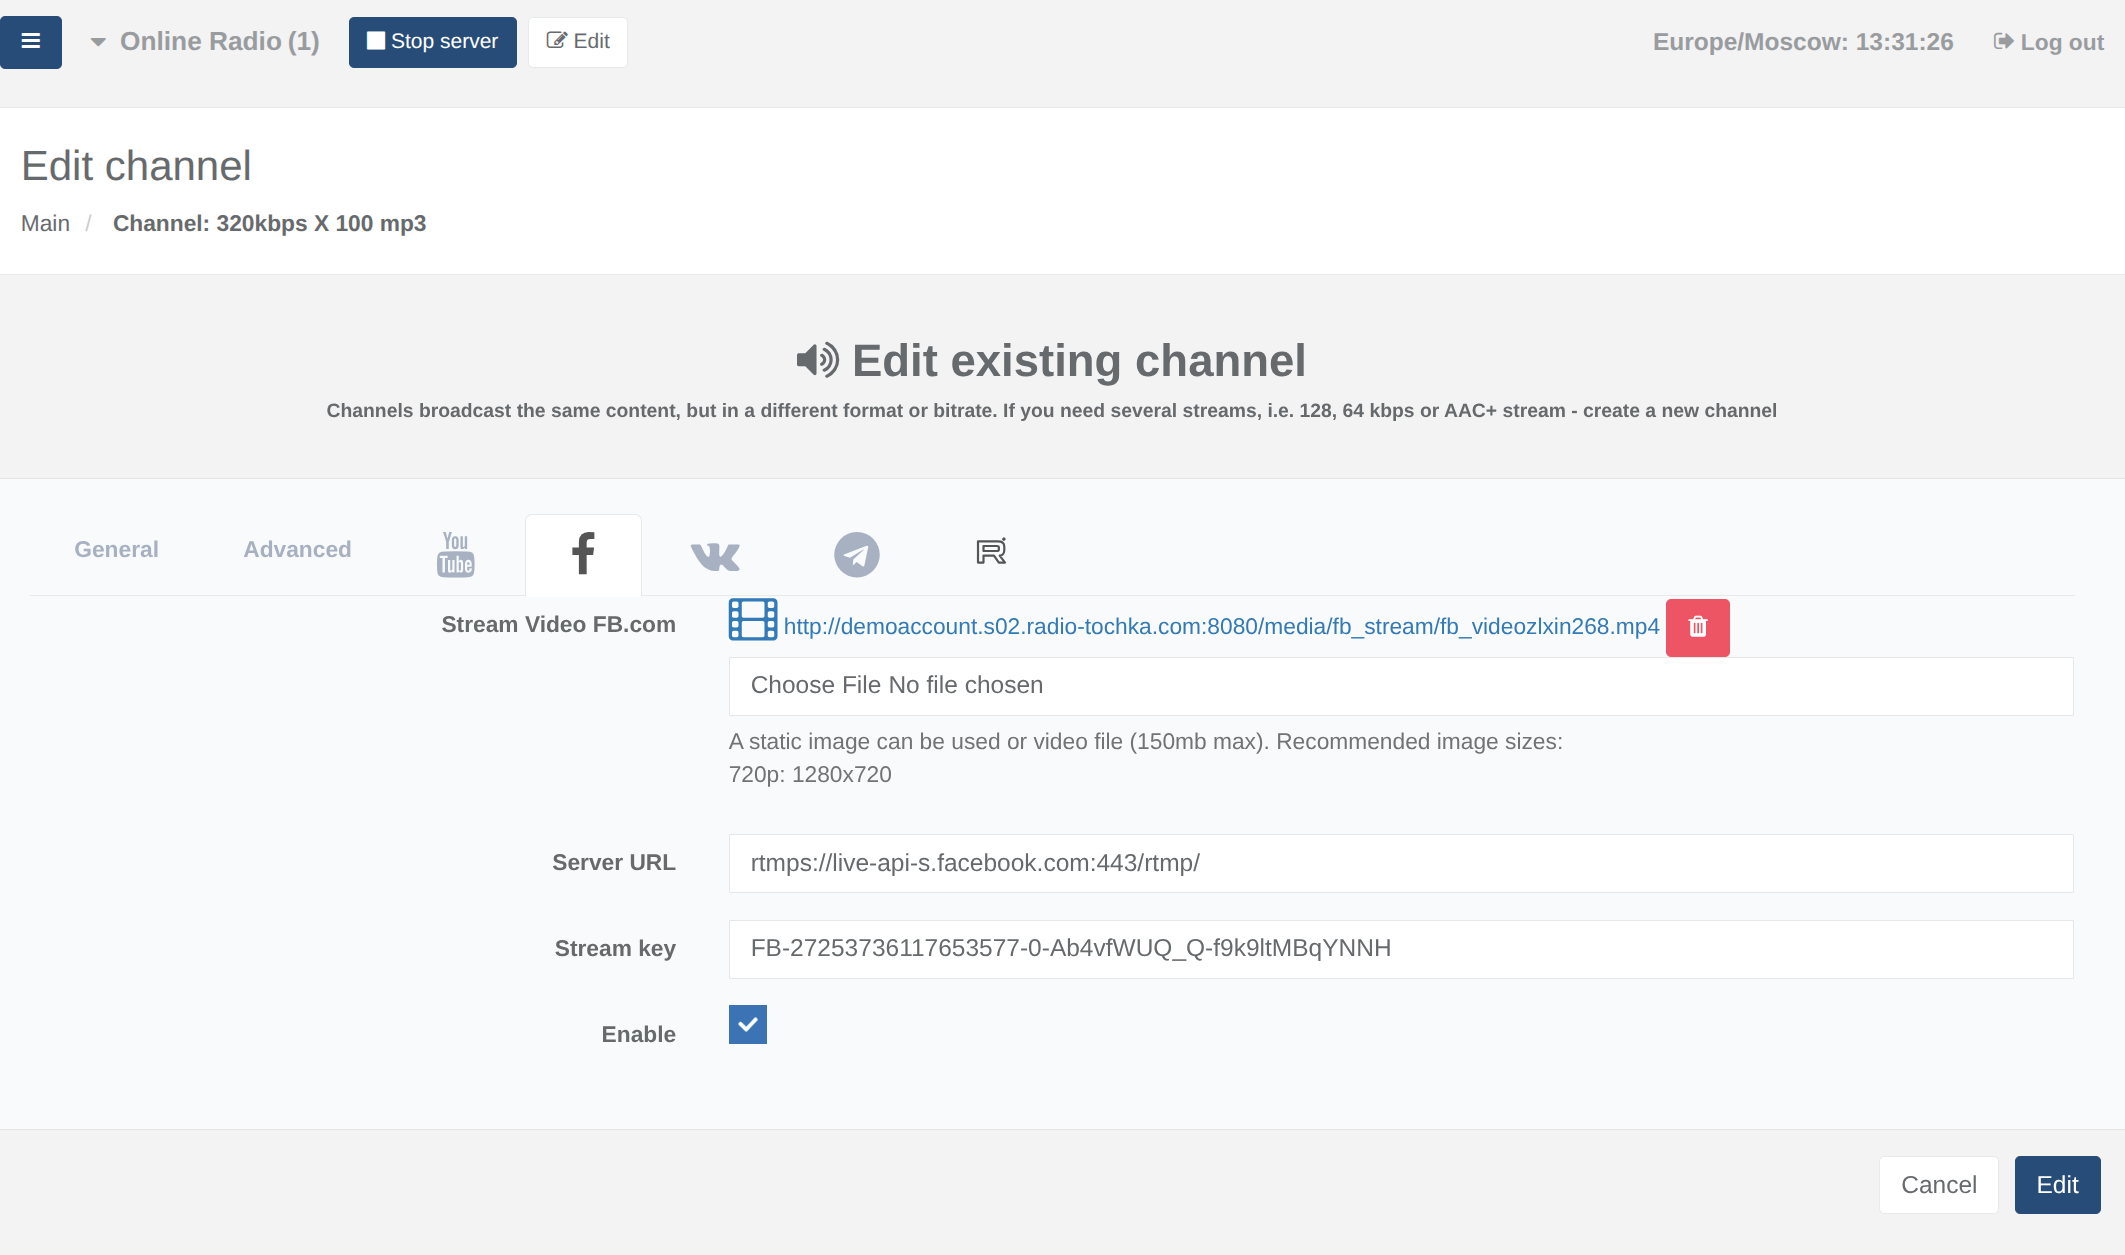
Click Edit for the selected channel.
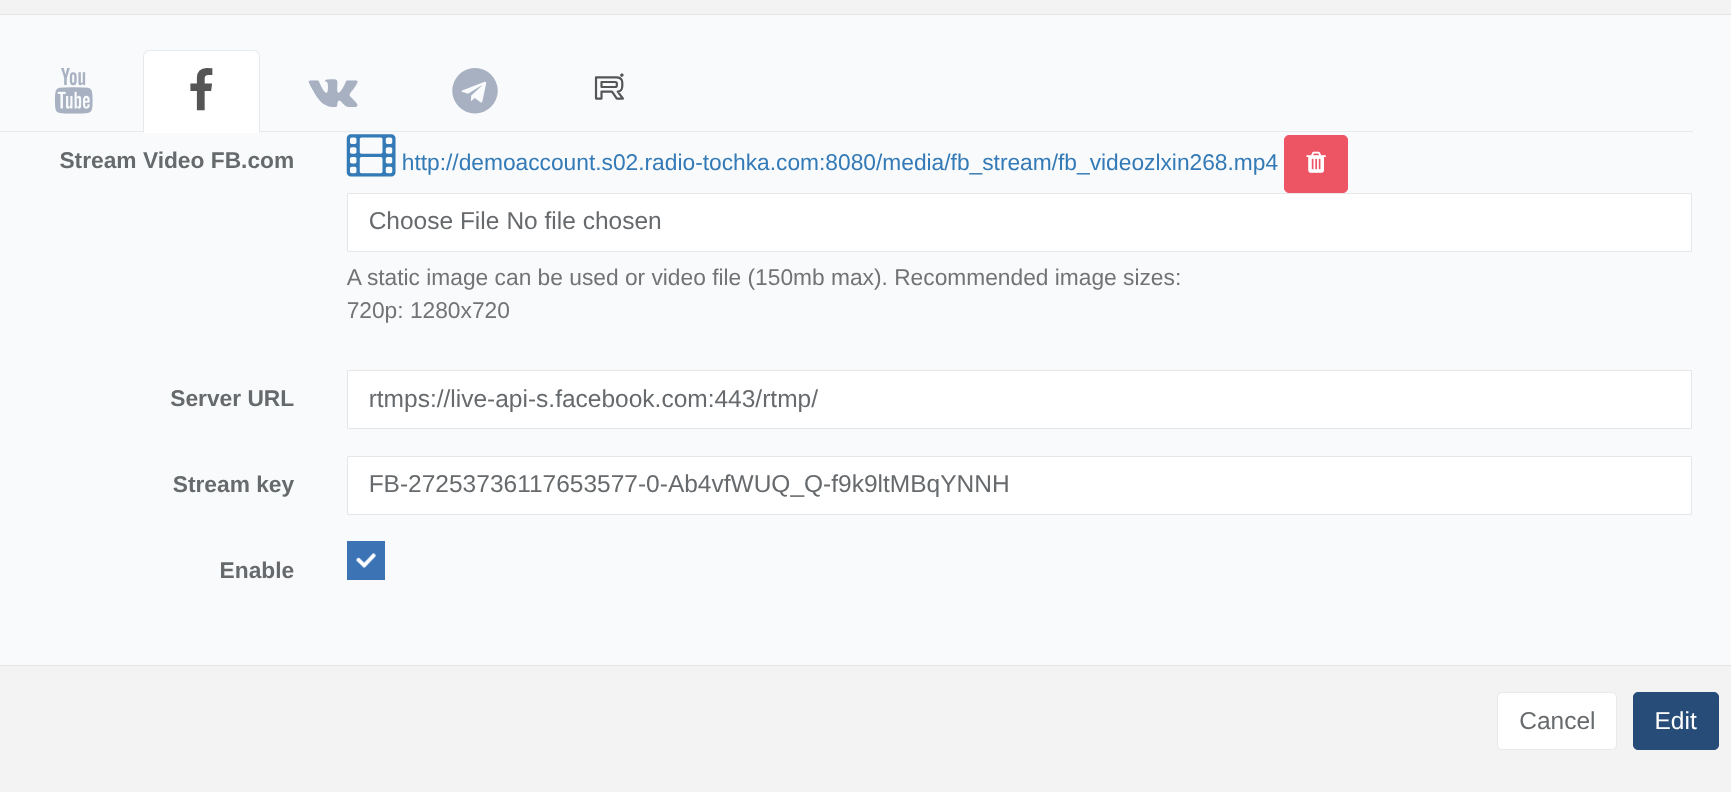
In the settings window, open the Facebook section and fill in the required fields:
- stream URL;
- stream key;
- a logo image or video clip to use as the stream visual.
The uploaded logo or video clip will be displayed in the Facebook stream instead of regular video.
Once all fields have been filled in correctly, you can enable streaming. Select the checkbox to enable the stream, then save the settings.
To stop streaming to Facebook, clear this checkbox and save the settings again.
The result should look similar to this:
An image should appear in Facebook Live Producer, and the Go Live button should become active:
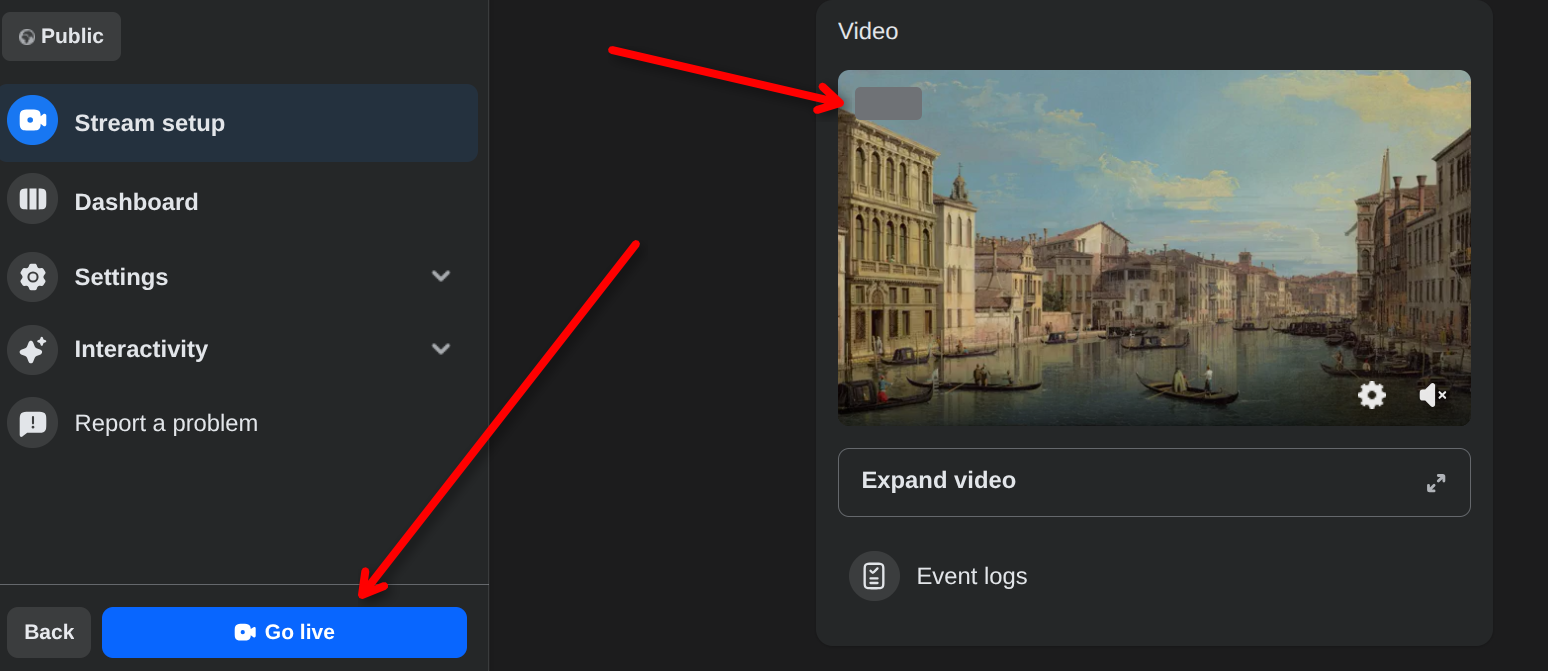
Congratulations! Click Go Live, and your radio station will start streaming on Facebook.
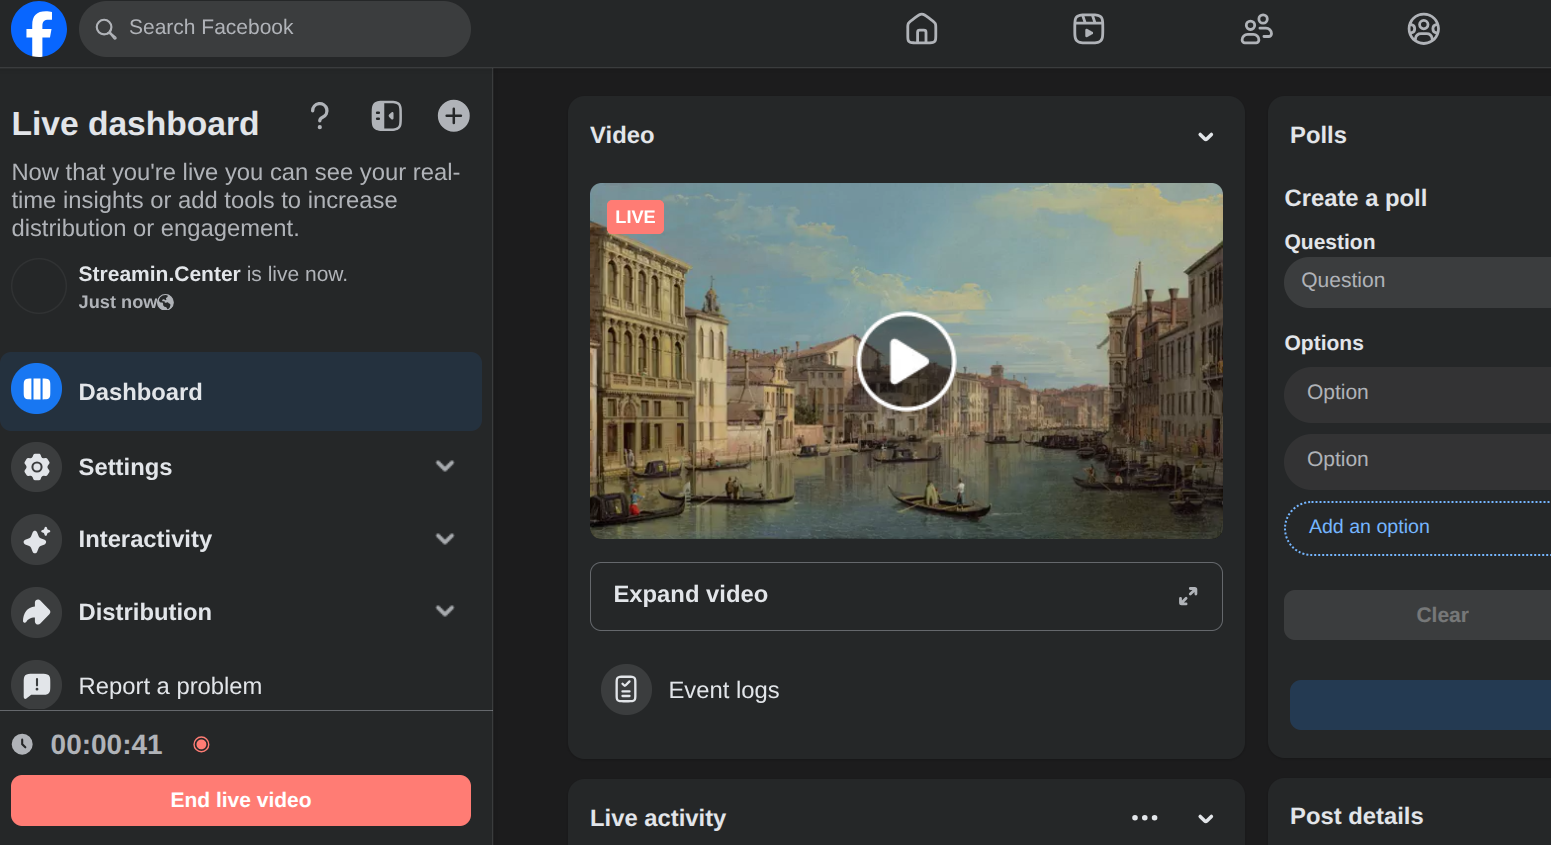
Please note that the standard Facebook Live limit is currently 8 hours.